


When I first encountered the term VPC, my mind immediately went to VPN, and I thought I would be learning how to create my own VPN. However, that was not the case.
A VPC is a Virtual Private Cloud and is very different from a VPN. As the name denotes, it is a private/isolated cloud hosted within a public cloud. It is a private space that gives you complete control over your virtual networking environment. It allows you to do several things, including selecting your own IP address, configuring route tables, network gateways, and creating your subnets.
To understand this concept better, try to imagine the public cloud as a famous coffee shop or eatery that is always crowded but has a table in an isolated corner that is always reserved. The table in this analogy refers to the VPC. Even though the eatery is full, no one will sit in the reserved corner except those who reserved it.
You can also think of your house, perhaps with your parents and siblings around. The house definitely belongs to everyone, but the part of the house that is your room is private and entirely yours. Only people you allow in can access it, and since you have complete control over that part of the house, you can customize it as you want. The house here is the public cloud, while your room is the VPC.
This analogy clearly describes how a VPC works. There are several resources available on a public cloud, and several clients are accessing those resources. Still, with a VPC, some of those resources are explicitly reserved for your use only.
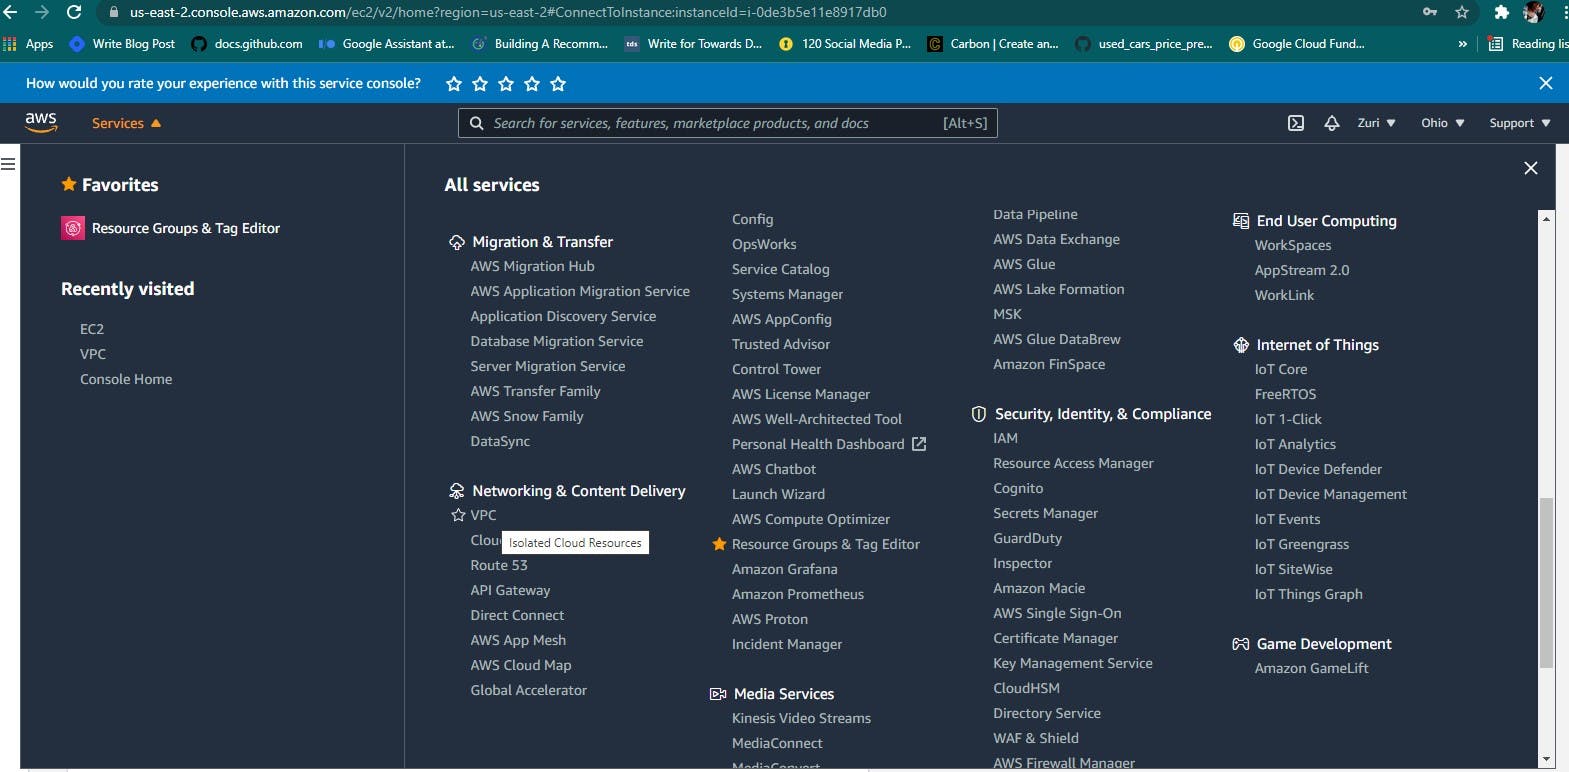
To create your own VPC using AWS, you will have to create an account with AWS. This can be done easily and quickly. After doing this, navigate to the VPC dashboard, and you can do that either by typing VPC in the search box or clicking on services which will bring you an array of services AWS offers, as seen below.
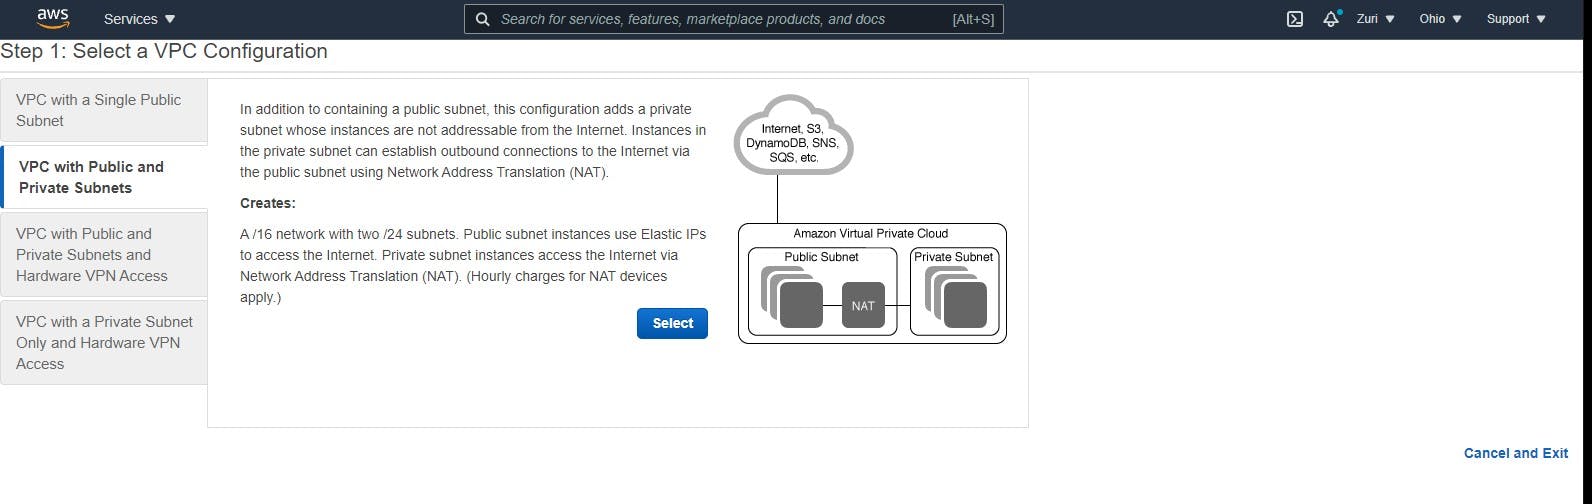
Once the dashboard opens up, the first step is to create your EIP (more information about this below), after which you go back to the VPC dashboard and click on the "Launch VPC" button to launch your VPC. From there, you are taken to a page for you to choose your VPC settings. On this page, you select the type of VPC you want to create, as seen below.
You are then directed to the configuration part from this page, which allows you to configure/customize your VPC.

The Elastic IP allocation box is where you select the elastic IP you've already created. After this, you click on create VPC, and your VPC gets created within a few minutes. Using AWS, we have two types of VPC:
- The Default VPC
- The Custom VPC
Default VPC
The default VPC comes with every AWS account. When you create your AWS account, a default VPC is created with default subnets and other components. This VPC is not difficult to recognize, as seen below. However, it is not a secure VPC, and this is where the second type of VPC comes in.

Custom VPC
A custom VPC is the more advisable type of VPC, as it is a VPC you can customize to suit your needs, just as the name suggests. While creating this VPC, you get to choose and define what you want in the components of your VPC. It is your configuration, to your taste. An example of a custom VPC is the "SCA" VPC configured above and seen in the image below.

What are the components of a VPC?
The components of a VPC are what make up a VPC. In other words, they are what makes a VPC a VPC. Let's take a look at some of them.
- Elastic IP (EIP)
- Subnets
- Route tables
- NAT gateway
- Security group
- NACL
Elastic IP
An EIP is also known as Elastic Internet Protocol. It is a reserved public address that can be assigned to an EC2 instance in any region. The option to create this is available in your VPN dashboard, by the left. After finding it, you can expect a page like the one below, after which you click on create. This is the first step to carry out before launching the VPC wizard. After doing this, you can then leave the page to continue creating your VPN.
Subnets
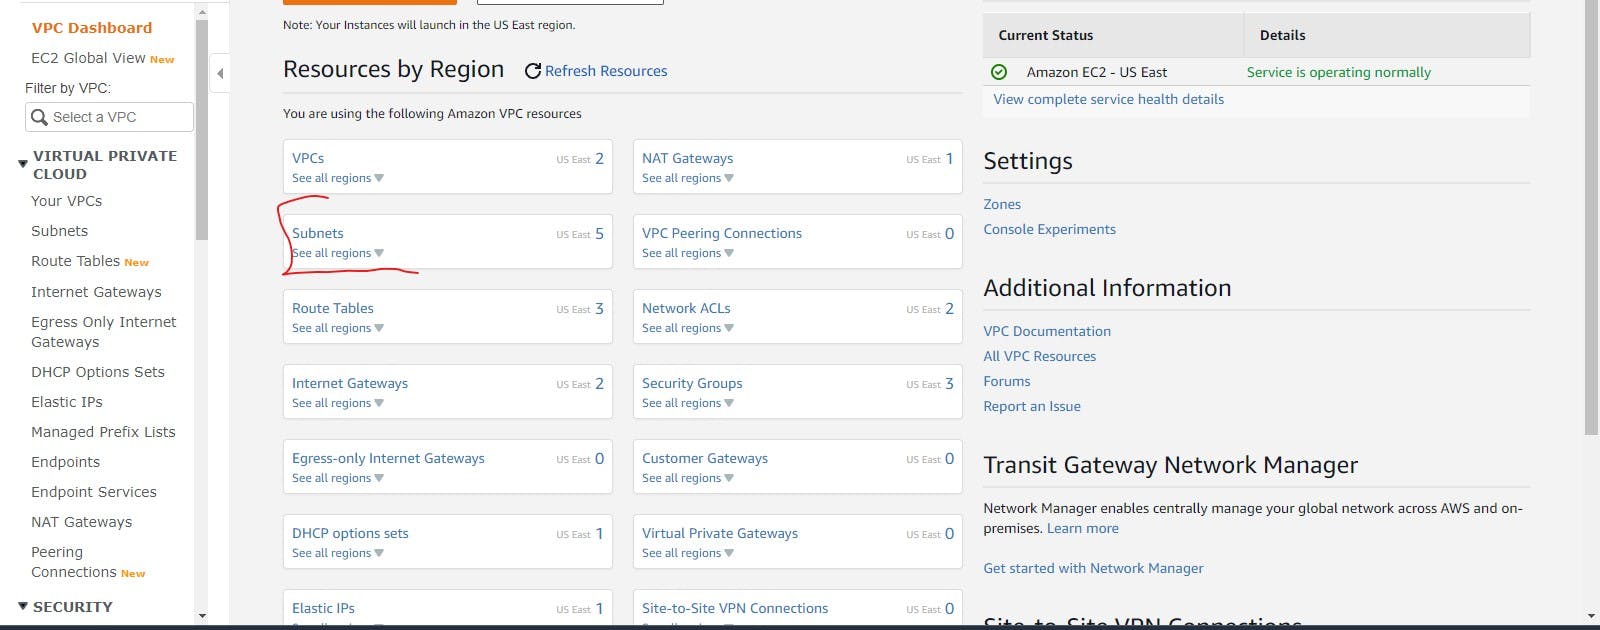
Subnets are sub-networks. They are like containers but for routing purposes. They make networks efficient by shortening the distance network traffic pass through and eliminating unnecessary routers. It is a subnetwork in a network, something like a part of a whole. Subnetting is dividing part of the network for private use. It helps narrow down the IP address to usage within a range of devices. To create your subnet, you click the subnet option on the VPC dashboard, as seen below.
It is essential to know that there are two types of subnets:
- Public Subnets
- Private Subnets
Public Subnets
A public subnet is simply a subnet whose traffic is routed to an internet gateway. It basically allows its router to serve other devices.
Private Subnets
A private subnet is simply a subnet that does not have the default route to the internet gateway. They do not have a public IP address because they do not accept traffic from the internet. A private subnet can use the NAT gateway to send requests to the internet. Private subnets are also the type of subnet believed to be secure.
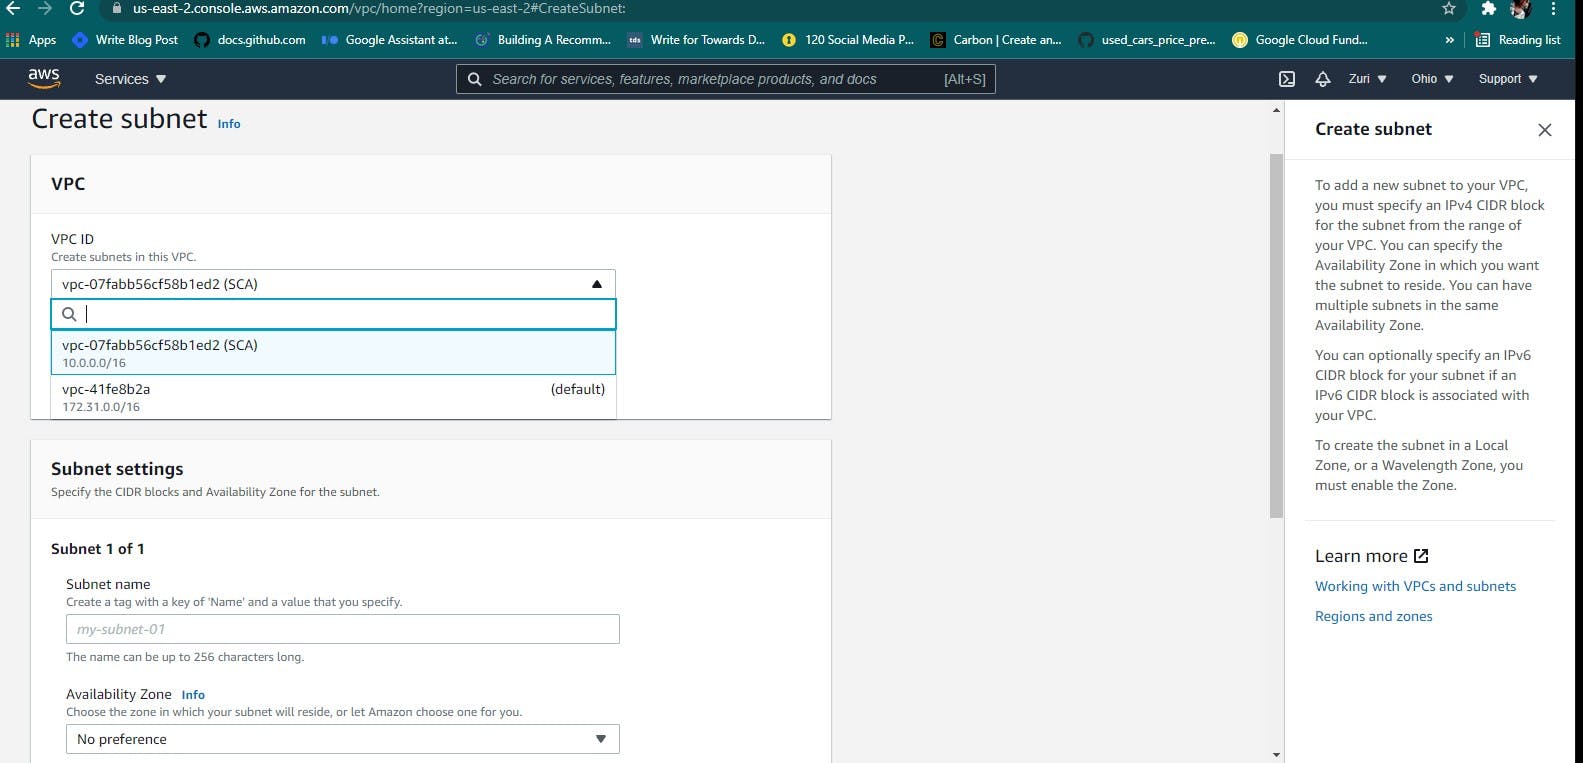
The process of creating a subnet requires you to choose the VPC you are creating the subnet in, after which you name your subnet, as seen in the image above. You then fill in the IPV4 CIDR block, leave the rest as default, then go ahead to create your subnet. Repeat the same steps for the second subnet.
Route Table
A route table is what allows internet access, as it is attached to your VPC. It is like a database containing a set of rules - routes- to determine where to forward or direct network traffic from your VPC. To add a new route, you click on the 'Routes Table' option in the VPC dashboard highlighted in the image below. For every VPC you create, a route table is created by default. To edit that route table, find it on the routes page and click on it.
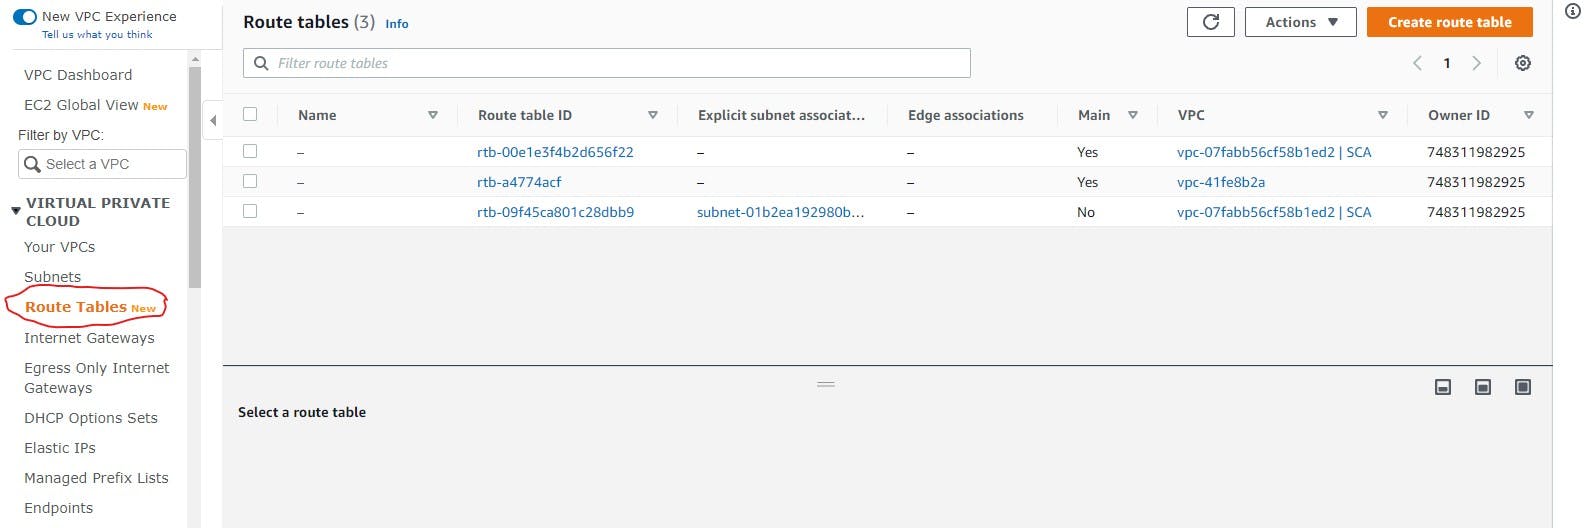
After opening up the particular route table for your VPC, if it is not yet associated with a subnet, you should associate with one of your subnets, preferably the public subnet. If it is already associated with a subnet, it will show as the third route table in the image above. Click on the edit button after opening up your desired route table. If a route like the one highlighted below is not yet created, you can add it manually by clicking the 'Add route' button.
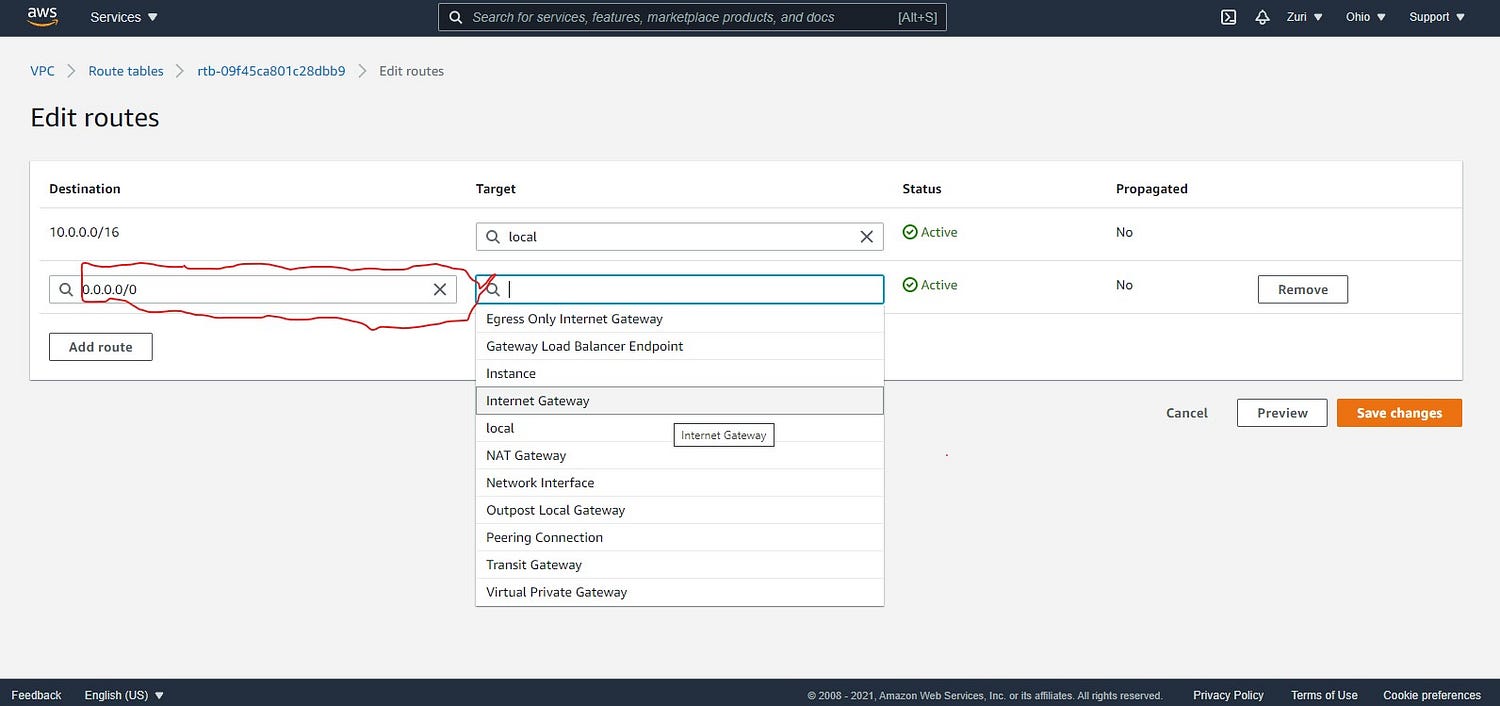
Once you do, please give it a destination of 0.0.0.0/0 as seen above and a target of Internet Gateway, then save the changes.
NAT Gateway
A NAT gateway allows instances in the private subnet to connect with the internet so that it prevents the internet from having a connection with these instances but responds to requests from the private subnet. NAT gateway means Network Address Translation gateway. To create a NAT gateway, you will find the NAT Gateway option by the left side of the VPC dashboard, along with other options. Once the page opens up, click on 'Create NAT Gateway,' and the page below will open up. You can fill in the options as it is in the image below.
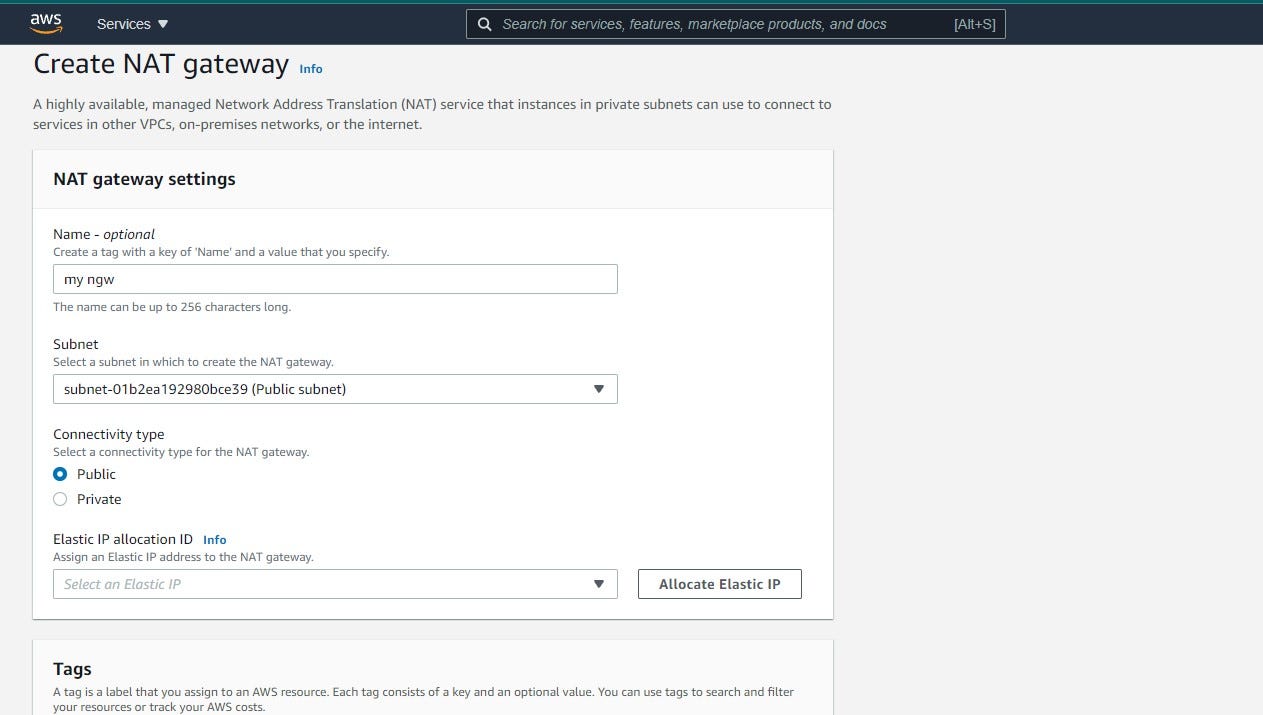
For the Elastic IP option, you need to select the EIP you created for the VPC. After doing this, click on 'Create NAT gateway,' and you are ready to go.
Network Access Control List (NACL)
A network access control list is a virtual firewall for your subnet. It is a layer of security that controls traffic going in and out of your subnet. When you create a VPC, an NACL is automatically created by AWS. A Network Access Control List can take on multiple subnets, i.e., numerous subnets can be associated with one NACL, but a subnet can only be associated with one NACL.
Security Group
A security group is basically a virtual firewall that filters or controls incoming and outgoing traffic. Keep in mind that security groups function at the instance level, not the subnet level. Inbound rules control incoming traffic while outbound rules control outgoing traffic. You can configure your security group while creating your EC2 instance, as it is one of the processes required to create an instance.
One significant difference between NACL and security groups is that a security group operates at the instance level while NACL operates at the subnet level. These various components make the AWS VPC functional and allow you to create your own private space in the public cloud.
My utmost appreciation goes to the She Code Africa team, Ada Nduka Oyom - the founder, Esther Okafor - the project manager, Deimos Cloud, and my able mentor - Olumide Falomo .
I hope you enjoyed reading this as much as I enjoyed writing it. I also hope you found this helpful. I would like to hear from you, so feel free to drop a comment or connect with me via Twitter, LinkedIn, or you can check out my Github page for some cool projects.